We’ve gone over those days when it was tough to sit at home or in your office and create an order form on your WordPress website without making some calls or mailing someone for technical assistance.
In this post, I want to show you how to easily create any billing or order form on your WordPress powered blog (without the help of any webmaster) to allow your visitors to buy your items or services.
You may not want to deal with the complexity of Woocommerce or any other not-so-easy e-commerce tool for WordPress.
All you need is WPForms WordPress Form plugin. The truth is this is far beyond creating simple forms on your blog. We’ll some attractive uses of this plugin later.
Click here for details about WPForms
Table of Contents - What is covered in this post
What can you sell on your WordPress site?
If your site or blog is not primarily meant to sell something, you may find it difficult coming up with a product to sell.
However, you may want to start off with start selling your services. Create an order form and allow your readers to pay for your consultation or whatever service you offer.
If you don’t have a service, you may want to hire some experts to create your product. Another idea is to grab some PLR products, work on it and sell. My first product I sold was a PLR product. See more about it here
In any case, there are always smart ideas to come up with something to sell on your WordPress website.
How to create order forms in WordPress easily
Watch this quick video:
I think that video is quite straight forward. But we’ll be looking at some text guide below.
Step 1 – Download and install the WordPress Form Plugin
First go download WPForms here You may want to follow this document for step-by-step installation instructions.
Here are some other things you can do with WPForms:
Step 2 – Install the Payment Addons
In order to create forms with billing options, you will need to install payment Addons. Don’t worry. These are free Addons that are available with WPForms premium.
There are two payment integrations and I recommend activating both. These are:
- PayPal Standard Addon
- Stripe Addon
To enable these Addons, go to WPForms – > Addons
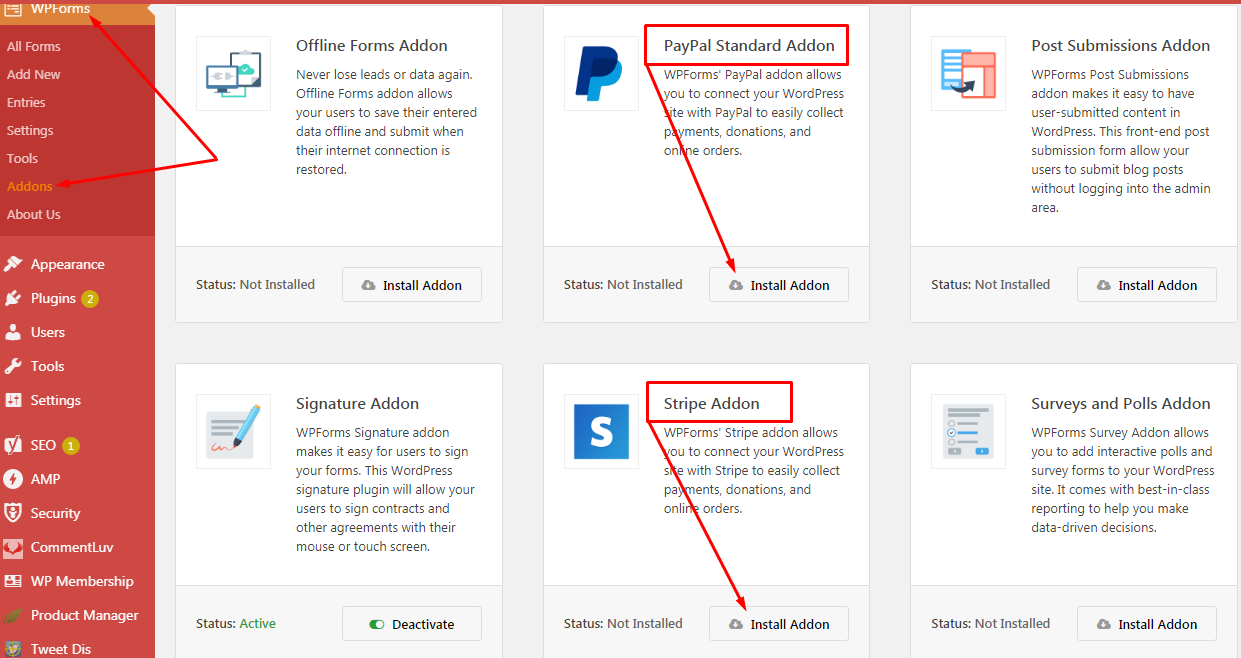
This is quite easy to handle.
Simply locate the Payment Addons on the list of available Addons. Click the Install Addon button. The Addons will be installed, allowing you to create your order forms.
Next, we are going to move on to creating our order forms.
Step 3 – Create your first order form
Go to WPForms -> Add New. This brings you to the following page:
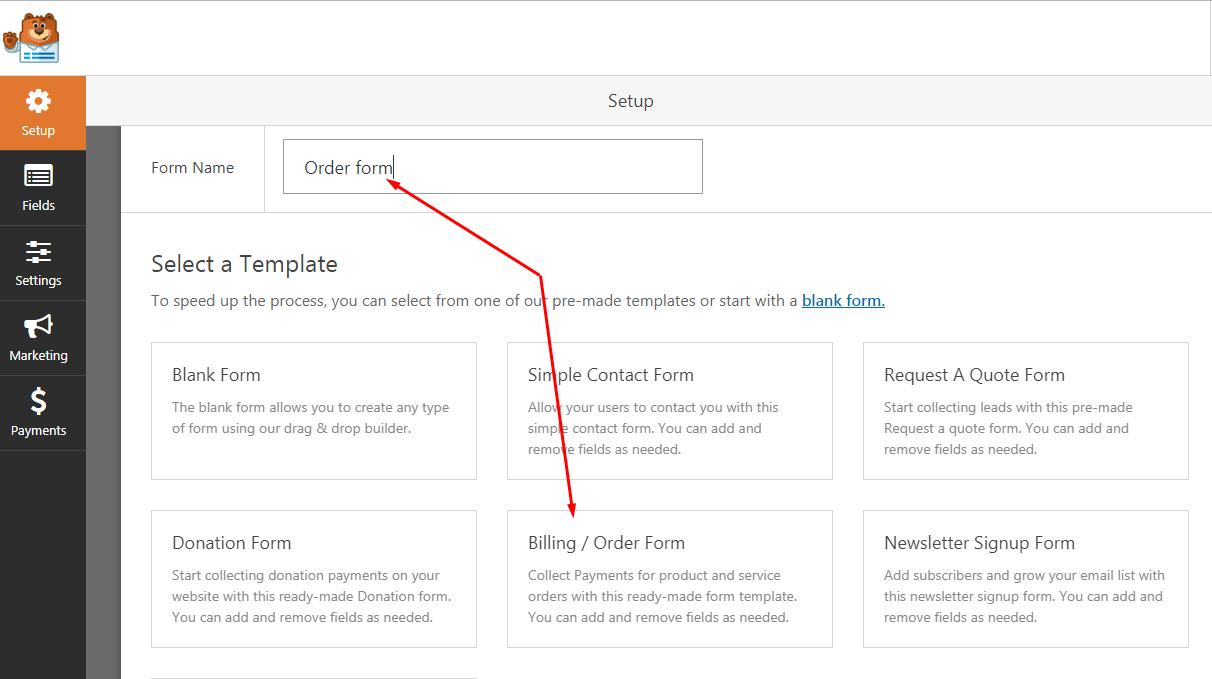
Enter the Form Name and click the Billing/Order Form box. This will populate the free ready-made template. You may want to start with the Blank Form option and create a completely new order form from a blank page.
By click the Billing/Order Form, you get to the form editor:
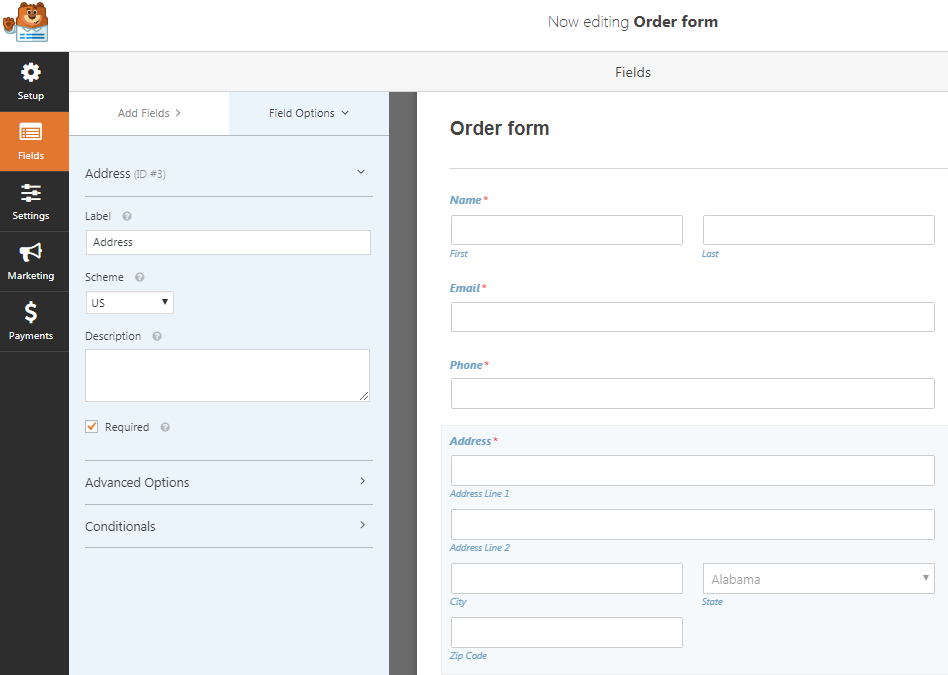
You are free to add/remove fields from the pre-made form. Click on the form fields to rename, make it required, and other basic options.
Step 4 – Set your Payment Provider
Earlier above, we installed Paypal and Stripe as our two Payment services. At this point, we are going to add them to our new order form.
Click the Payments button on the editor to pull up other editing options:
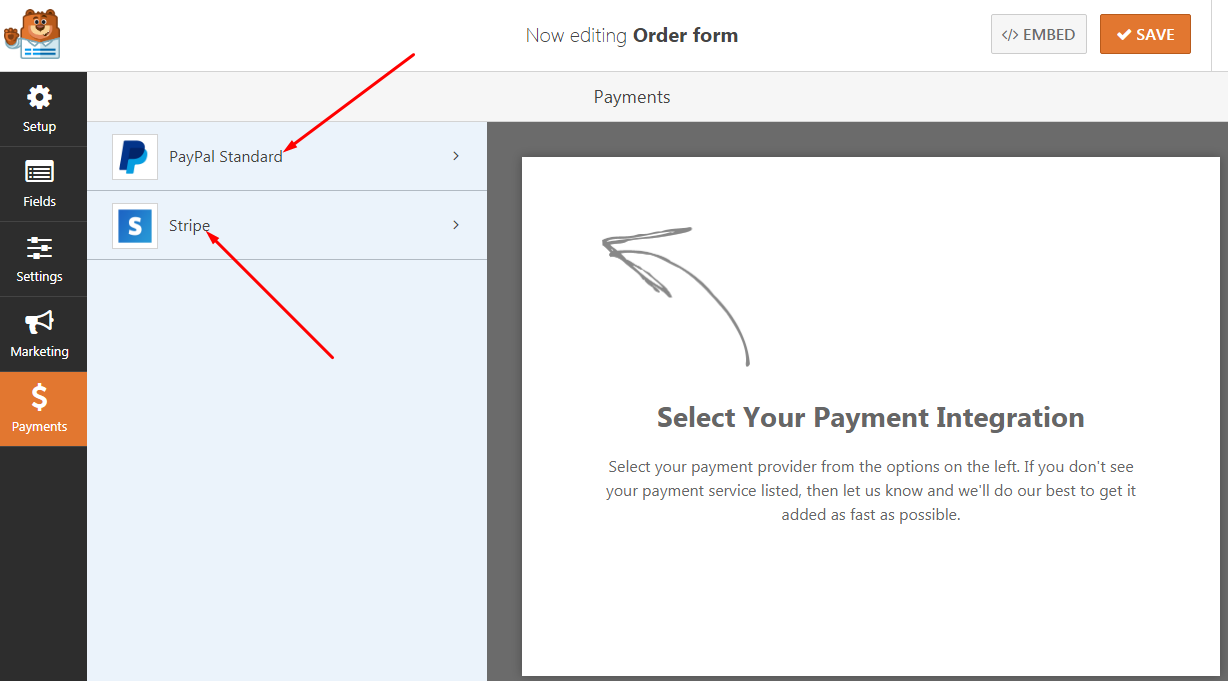
Now we see Paypal Standard and Stripe.
The Paypal option is straight forward. All you need is to click to enable it and enter your Paypal Account email and some other basics as you may require.
To enable Strip, you will have to go to the settings page to enter your stripe API which you can get from your Stripe account.
Other important settings
Your billing/order form is created but some other basic settings are required.
Go to Settings -> Notifications to create different order notification message.
You will now need to set the order confirmation page. Go to Settings -> Confirmation. You are just telling the system where to redirect the reader once payment is complete.
Always, make sure you click the Save button to save your form as you move on.
Step 5 – Add your form to your post/pages
There are three ways to add the order form to your blog or WordPress website and start selling and collecting payment:
1 – Create a form page
This is a quick way to create a standalone page for your order form. Go to Settings – > Form Pages
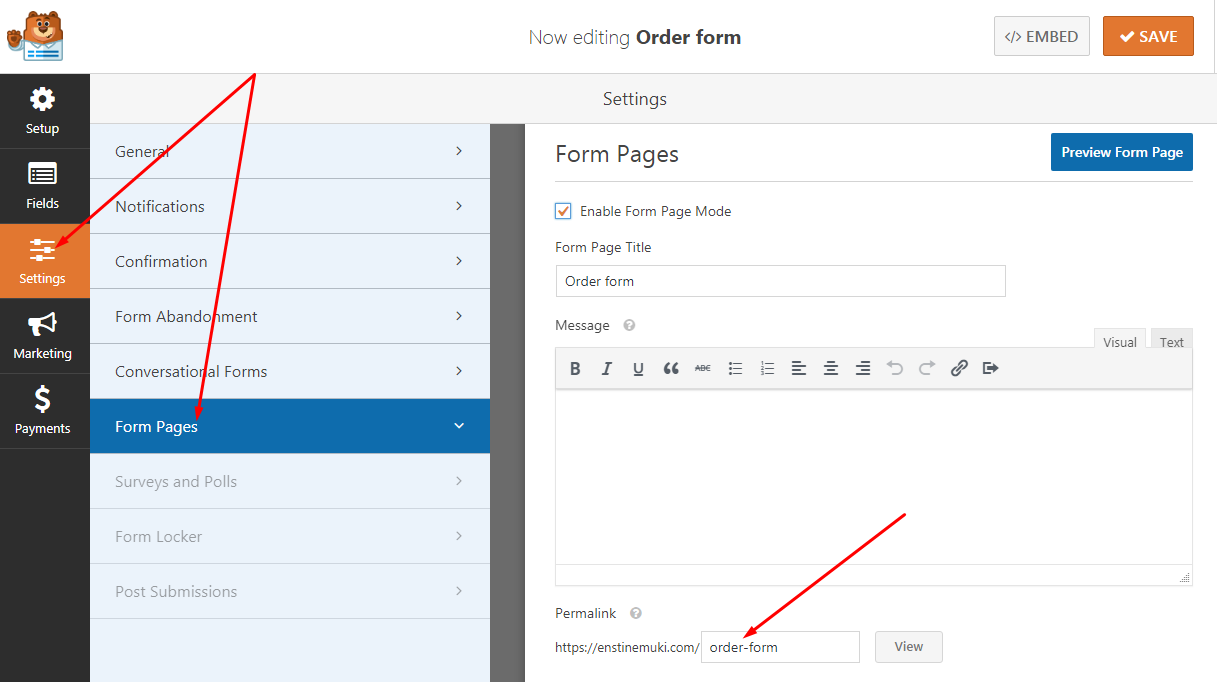
Simply save and grab the page to share or link to from a post.
2 – Grab and paste the shortcode
The shortcode allows you to add the form to any of your blog posts or page, or even add it to a sidebar. Simply click the EMBED button top right of the WPForms editor. Copy the code to where you want the publish the form.
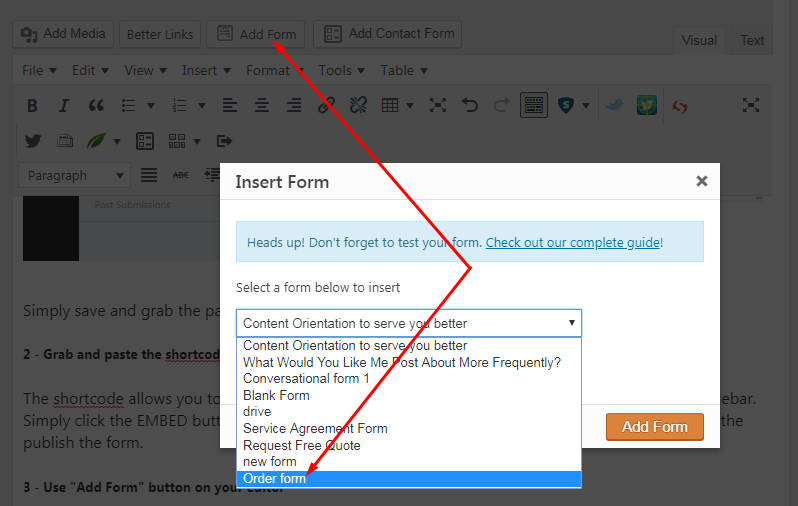
3 – Use “Add Form” button on your editor
If you are still on the classic WordPress content editor, Click the Add Form button on the editor’s toolbar:
If you are on Gutenberg, click on the Add Block (+) icon and search for the WPForms block using the search box and click on it.
Conclusion
From all indications, it’s possible to create a billing or order form on your WordPress blog easily. All you need is the right plugin and WPForms doesn’t have any rival.
[thrive_link color=’blue’ link=’http://shrsl.com/1p0aw’ target=’_blank’ size=’medium’ align=’aligncenter’]Click here to download WPForms[/thrive_link]
Comments are closed.