Stripe is fast becoming one of the most widely used Payment processors for digital entrepreneurs. WPForms is currently one of the most-used form plugins for WordPress because of a number of factors I’m going to outline below.
Putting the powers of these two tools together, you are going to be able to build a rock-solid WordPress business website.
I will show you in three simple steps (even grand ma finds this very simple) how to combine the two and start accepting payments on your website.
Combine Stripe and WPForms Easily on WordPress
Whether it’s once-off or recurring payment, these two solutions have you well covered. Let’s follow these three steps and get it all setup.
1. Get your stripe account and WPForms plugin ready
This is definitely the first thing you must do: get your account for the two tools.
If you haven’t begun with Stripe, check it out here. For more about getting the most widely used WPForms form plugin for WordPress, go to this page.
At this point, you should install and activate the plugin. For step-by-step guide on getting it installed and setup, go to this page.
WPForms is my #1 WordPress form plugin. I have a couple of articles you may want to read for more:
2. Download and install the WPForms Stripe Addon
Now, you have your Stripe account ready. You’ve also installed WPForms. Note that you will need the pro license to be given access to the addons.
The next thing is to download and activate the Stripe WPForms Addon.
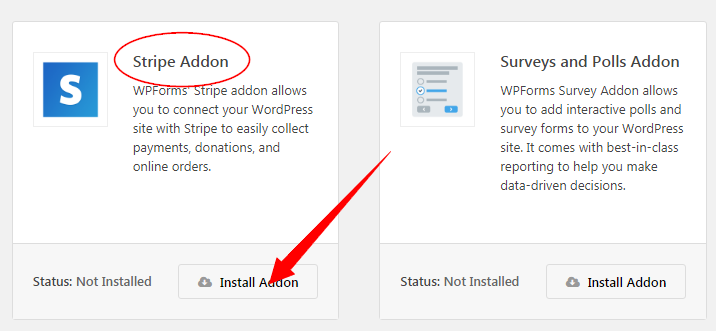
Go point to WPForms on menu bar and click Addons

This will take you to a list of available addons. Locate the Strip addon and click to install.
Once you have Stripe Addon installed, you’ll need to connect your WPForms on your blog to your Stripe account.
To get this done, you’ll have to point to WPForms -> Click Settings on the left menu of your WordPress dashboard.
On the Settings page, go to the Payments tab:

Click on Connect with Stripe and follow the steps. To learn more about connecting with Stripe, read this document.
For a quick tip, sign into your Stripe account before clicking the button to continue.
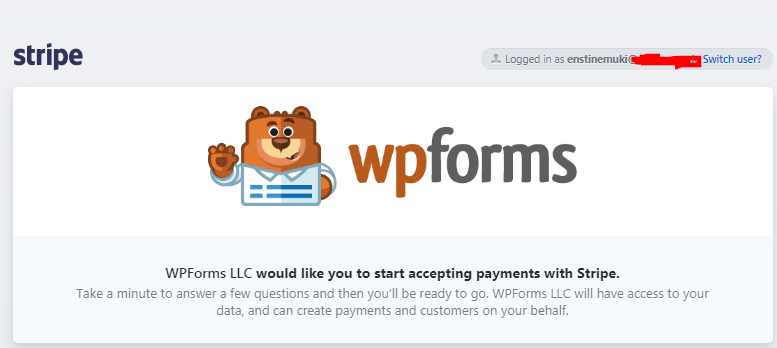
Make sure you follow screen instructions and accept the terms to confirm your connection.
3. Add Stripe Payment to your forms
You now have Stripe and WPForms connected on your blog.
Congratulations!
The step step is to add the Strip payment option to your forms. You are going to be able to add it both once off and recurring payment types.
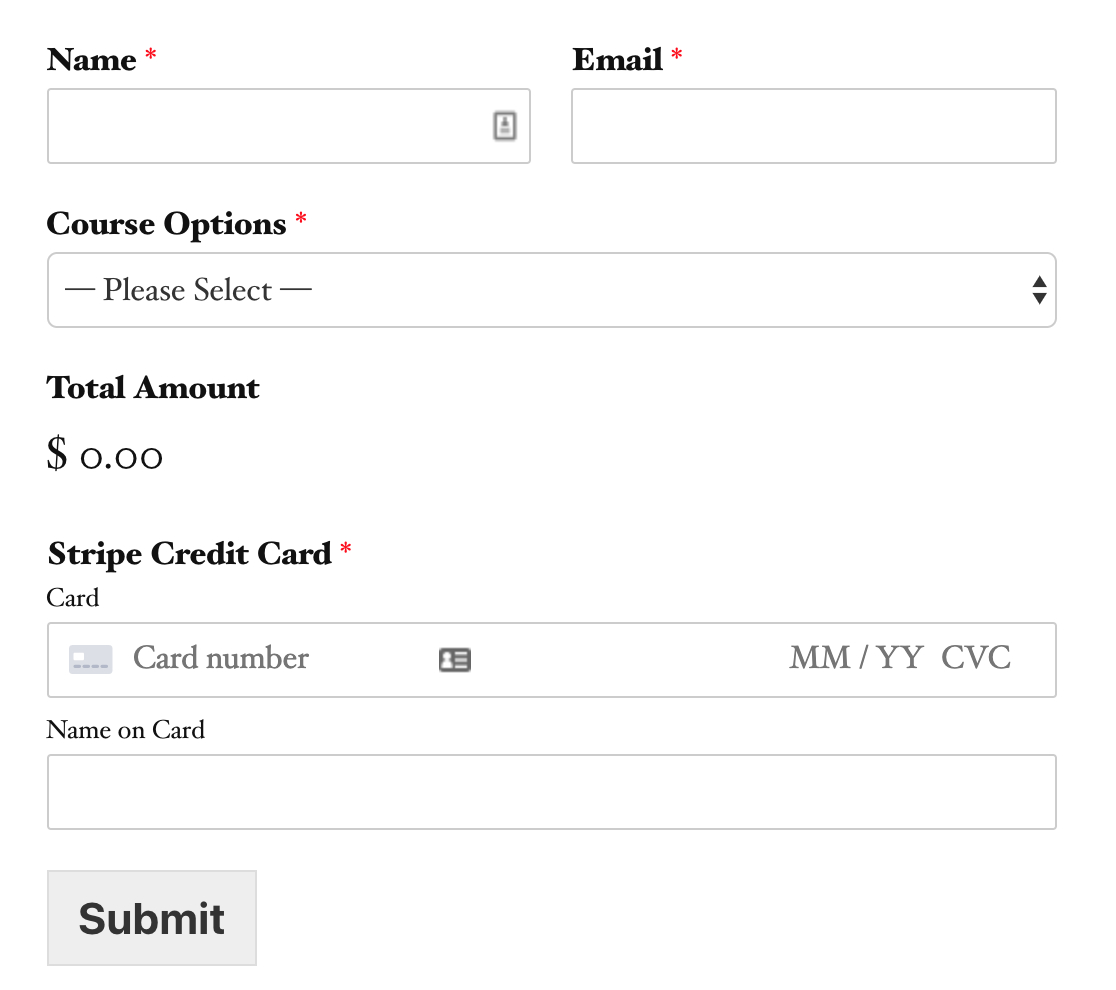
If you have an existing form, you will have to edit it or actually create a new form. You will need at least two form fields for Stripe Payment to function. The required fields are:
- An Item field (Checkbox Items, Multiple Items, Dropdown Items or Single Item)
- A Stripe Credit Card field.
You may go ahead and add other fields as required by your business. However, to reduce cart abandonment, it’s recommended you reduce the number of form fields on your order page to the minimum possible.
A simple order form with Stripe and WPForms will look something like this:
Enabling Stripe Payment for the form
Once your form is ready, you’ll have to enable Stripe Payment for it to work.
Go to Payments » Stripe. From the Stripe panel, check the box labeled Enable Stripe payments. You’ll have to add short Payment Description which will appear on the user’s credit card statement.
If you want payment receipt sent to en email, under Stripe Payment Receipt, choose the email field.
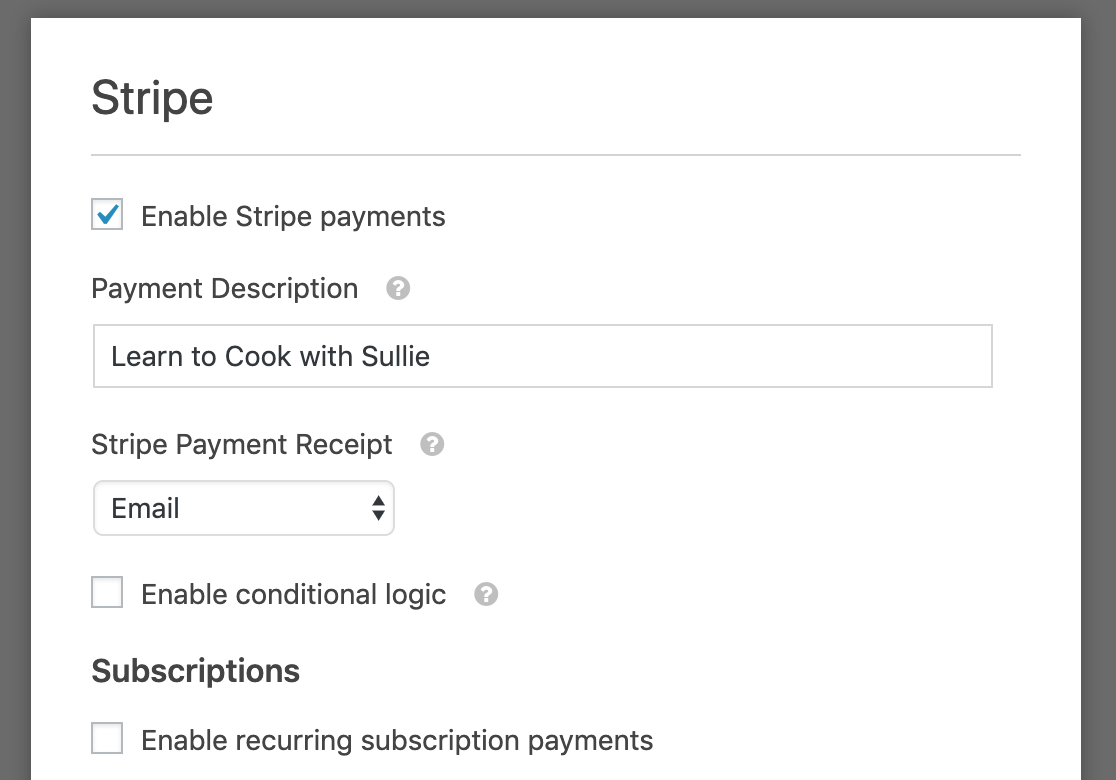
Other options on Stripe settings are:
- Conditional Logic
- Recurring Subscription payments.
Remember WPForms is a complete form solution for your WordPress website. The Conditional Logic option allows you create what I call “Smart Forms” that automatically readjust the form based on user’s selected options.
Once you click to enable recurring subscription payments, additional setting options will appear:
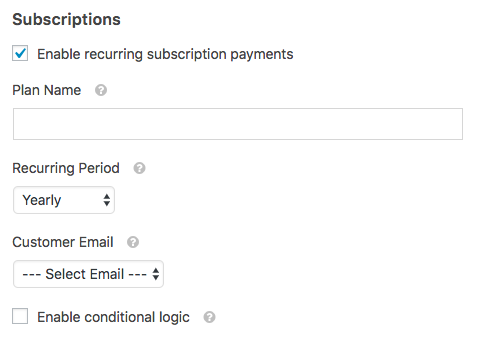
First, the Plan Name field allows you to enter the title of the subscription. Something like “X Success coaching program” This will appear on the Stripe Transaction.
The Recurring Period drop down field allows you to choose how often the recurring payment should occur. The options are: Daily, Weekly, Monthly, Quarterly, Semi-Yearly, or Yearly.
Finally, the Customer Email is a required field to create a subscription for a customer on Stripe. It allows you to select an Email field from your form where the customer can be reached.
For more on steps to add Stripe to your WPForms, I recommend you checkout this document.
Why you need WPForms
I think every WordPress website should get this plugin. It’s by far the most complete forms solution for your WP-based website. This allows you to create any form possible. If you think it, you’ll have it.
Adding to this, the team is well known for creating successful WordPress applications.
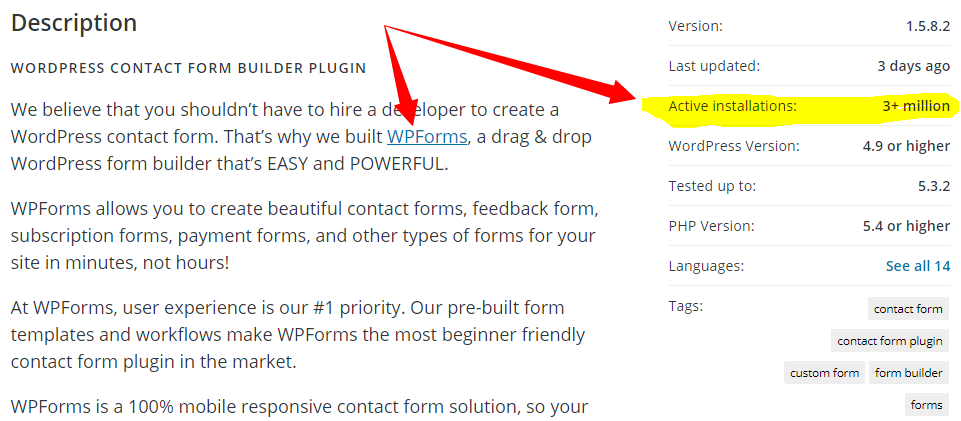
With over 3 million active installations, you may be wrong to think that 3 million users are making the bad choice:
For a complete list of WPForms features, click here.
Conclusion
Drop a comment and let me know what you think about this combination: Stripe Payment and WPForms for WordPress
Comments are closed.