
Sticky elements are those parts of a website that don’t disappear when you scroll down the page. Sticky content can be anything you want, such as business information, social media buttons, and various forms of navigation. You can use sticky content in pairs or inside a container.
Regardless of what you make sticky, the main goal is to ensure that the sticky parts remain consistent. Sticky elements are a highly effective design approach and are sure to make your website look more professional.
You don’t want your website to be hard to navigate since that discourages visitors to keep browsing it and encourages them to find a more approachable website. Implementing sticky elements in a WordPress theme improves user experience and has the potential to maximize the value of each visit.

As I said, sticky elements remain fixed on the page as the visitor scrolls up and down. Sticky elements lead to calls to action such as newsletter signups and allow visitors to engage with the main content, but also have a look at the ads and links.
Conversion rates are higher on websites that have sticky elements because visitors on those sites have an easy way of going through the page. However, you have to be careful when creating sticky elements and keep the design as well as functionality in mind.
If you are new to this and don’t know which sticky elements are the best to add to your WordPress site, here are some suggestions.
A WordPress sticky menu is probably the best pick for the first sticky element. It is also the most useful feature of a website, especially if a visitor is browsing it on a mobile device. When a user scrolls, the menu icon stays firmly on top. Aside from the top, you can put a menu on the side or the bottom. However, be careful not to take up too much space with your menu. You don’t want the menu to take the spotlight from the site’s header.
Since social media is taking over the world these days, the next logical sticky element would be social media buttons. A lot of traffic nowadays comes from different social media platforms. Because of that, you should give your visitors a chance to share your content via Twitter, Facebook, etc.

Pick buttons that go with your overall design and theme and ensure that the buttons look good on both desktop and mobile devices. You don’t want them not to show up on a mobile screen or not be the proper size on a desktop one.
Next, include elements that give more substance to your website, for example, an information box and email signups. Information boxes give more, you guessed it, information about you and your business. So if you want your information to be displayed clearly and effectively, a sticky information box is what you want to implement.
You can choose to display it prominently with a call to action or have a more subtle approach. But remember to keep it simple and elegant and not make it a distraction.
Email signups are the best way to connect with your audience. Also, building an email database is important for marketing and having an easy-to-access email signup form on your website helps you do just that.
The WP Sticky plugin
Now with all that sticky element information covered, I’m sure you are wondering how you can set up sticky elements yourself. Well, WP Sticky is coming to the rescue!
The most important feature of the plugin is that you can make as many sticky elements as you want for your WordPress site. If you want to make just one, sure, you can, but you are not limited to that by any means.
With WP Sticky, you can “stick” multiple parts of your content. Stick menus, information boxes, ads, buttons, and so on. And don’t worry, they will not budge while your visitors enjoy everything your website has to offer.
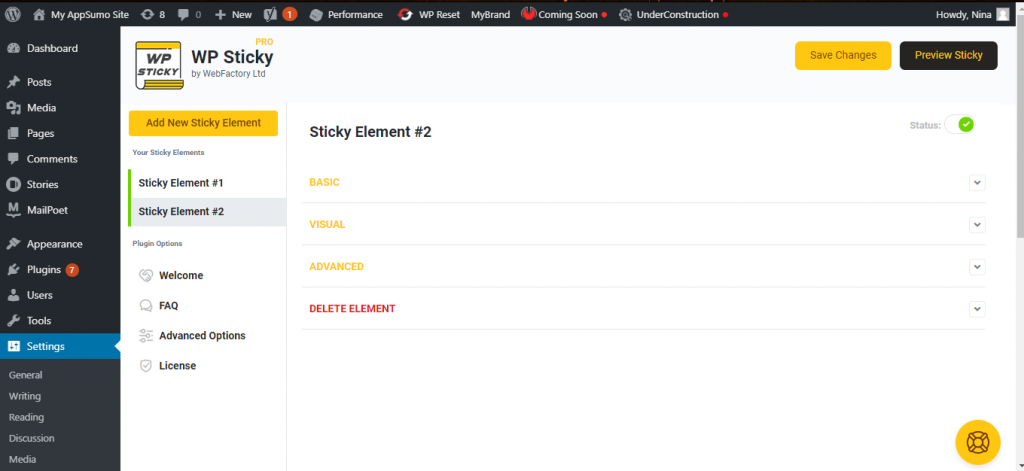
As you can see above, in the plugin settings, you pick how many sticky elements you want to create and configure their settings. There are basic, visual, and advanced settings you can adjust.
Basic settings
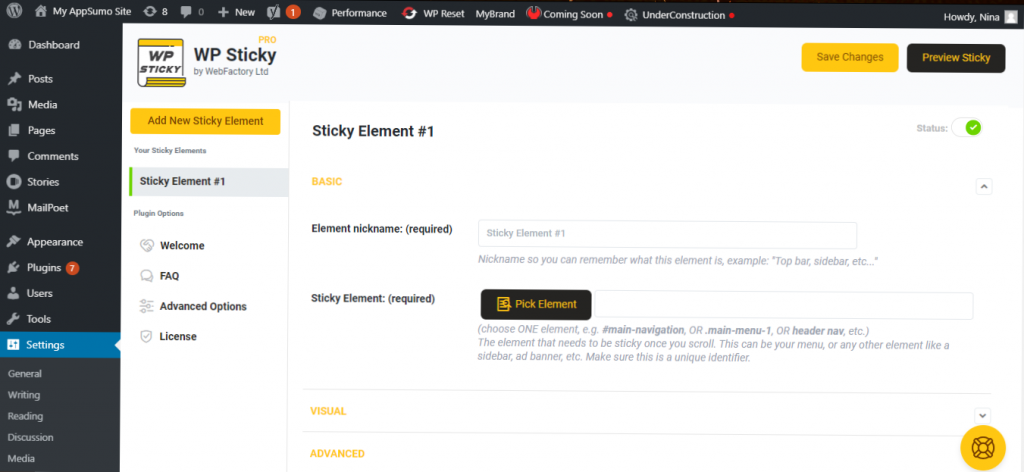
In the basic settings, you can set up a nickname for your sticky element, which is required, and of course, pick out which element you are going to stick. For example, your first sticky element could be a menu or navigation bar which is something a visitor will probably look for when they first land on your site.
Visual settings
Then there are the visual settings of each element. Making an element visually appealing and compatible with your WordPress theme is very important not only for your design but also for the user experience. You want every part of your theme to go together so nothing distracts from the main content.
Also, a good design improves the user’s experience, it is easy on the eyes and makes the whole page seem more professional and carefully made.
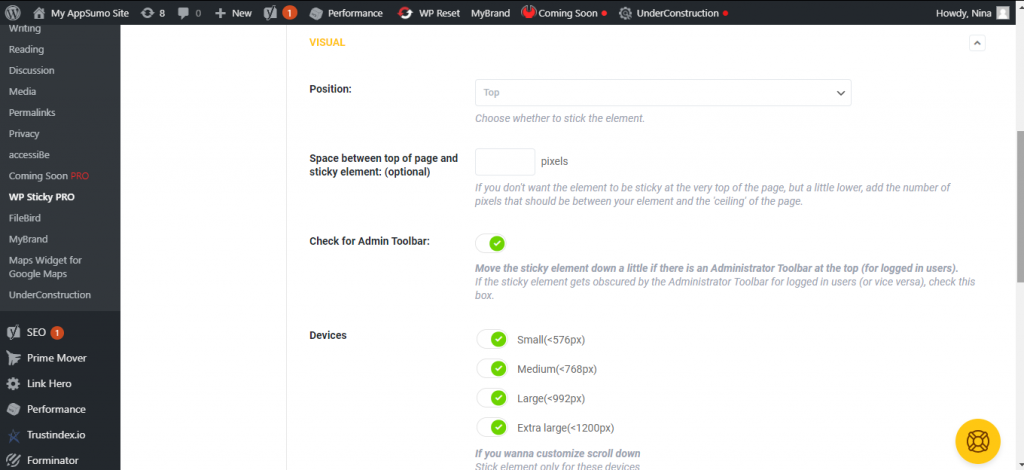
So, in the visual settings, you can pick the position of your element, whether that is top or bottom. And if you don’t want to have your element at the very top of the page, you can add a number of pixels that will be between the top of the page and the sticky element.
Next, you can choose if you want your element to move down when there are logged-in users on the page. You can also customize scroll down for different devices and add a z-index if there are some other elements that overlap with your sticky element.
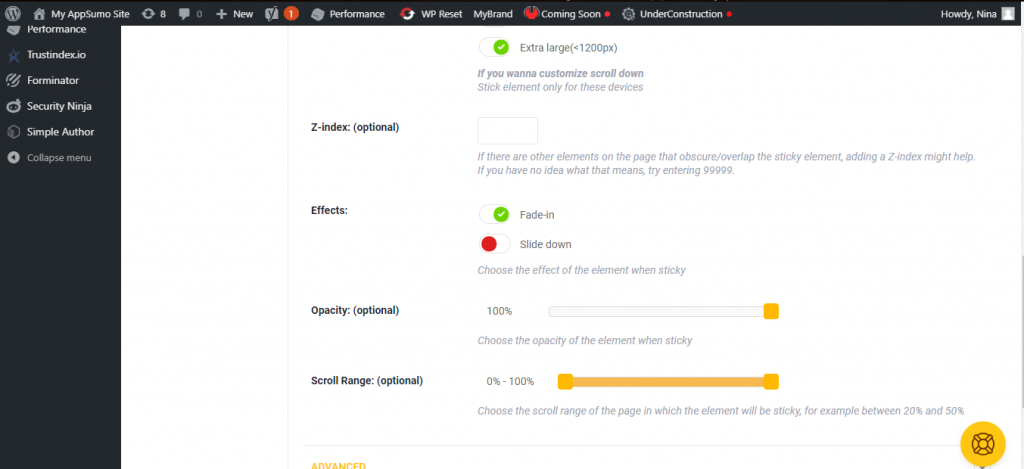
The final options in the visual settings are effects, opacity, and scroll range. Effects include fade-in or slide down. Opacity and scroll range are optional but are again allowing you to make your sticky element as compatible and as appealing as it can be. So use these options to make your element complement your page in a subtle way.
Advanced settings
Now we are coming to the advanced settings.
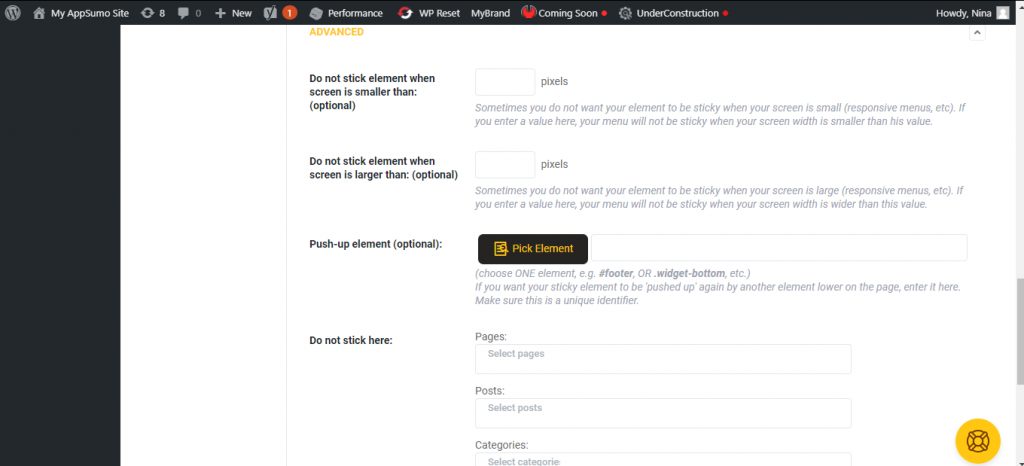
If you don’t want your element to remain sticky when the screen is too small, you can enter a number of pixels and thus ensure that, when a screen is smaller than that number, your element is not going to stick. And you can do the same thing when the screen is too big.
There is also an option to have one sticky element be pushed up by another one that is lower on the page.
Finally, you can choose where you don’t want your sticky elements to appear, whether that is pages, posts, categories, tags, or post types.
Deleting elements
The last option in the settings is the option to delete the element. So, if you don’t want to include a sticky element on the website anymore, you can just press the delete button and it is gone.
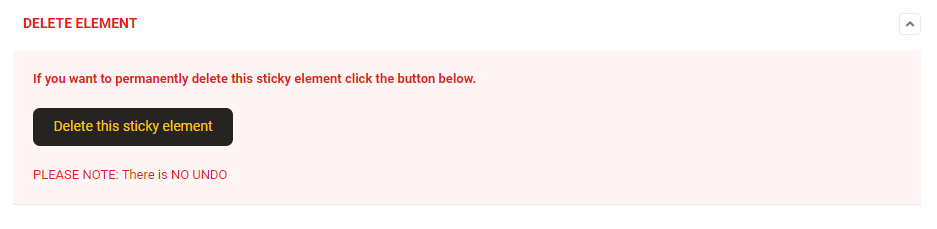
Keep in mind that the deletion of the element is permanent and there is no UNDO button. So use this if you are sure you don’t need an element anymore.
However, don’t fret even if you delete something by mistake because, as you can see, it is very easy to set up new elements.
Ease of use
One of the most useful features of this plugin is that you don’t have to write any code whatsoever! You just pick elements of the screen and let the plugin do its thing. You don’t have to worry about programming and coding.
The interface is simple and clear. Everything is efficient and takes you just a couple of minutes to set up.
Again, you can make as many elements sticky as you want and the plugin is compatible with all themes, page builders, and plugins.
If you find yourself confused or in need of advice and help, you can contact the people who built the plugin and get info straight from those who know exactly what they are talking about.
Pricing
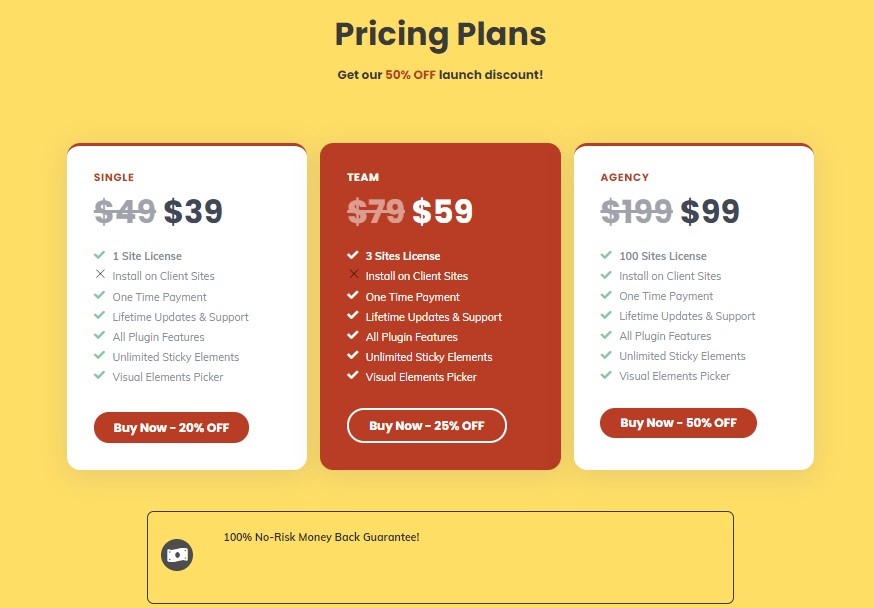
There are three options to choose from when it comes to price plans – Single, Team, and Agency. Single is 20% off right now which means you can get it for $39 and have a 1-site license. The Team plan costs $59 (with the 25% off discount included) and gets you a 3-site license. And Agency is 50% off, so you can buy it for 99$ and enjoy a 100-site license.
Final thoughts
Having sticky elements on your website can definitely improve the design and the user’s experience if it is done in a subtle and elegant way. On the other hand, if it is set up half-heartedly, it will distract visitors from the main content and make your website look sloppy.
WP Sticky is made to help you create sticky elements that will improve your website. It allows you to stick however many elements you want, and the best part is, you don’t need any coding experience because the plugin does everything for you. So be sure to check it out!
Comments are closed.