
Thousands of blogs are created every day but trust me, many of them see their end too soon. The reasons for their ‘quick death’ are as varied and as many as the reasons for their initial creation. By simply doing a quick Google search, you will find that most of these blogs are hosted on free platforms.
Though this doesn’t instantly suggest wastage, a huge number of them are near valueless junk files. Self-hosted blogs, on the other hand, don’t come without a price. While the price is not as low as your daily cup of coffee, it’s still not going to break the bank.
In today’s post, I will walk you through steps that will allow you to create a self-hosted, professional blog on top-notch servers by spending less than $60. I know you have your reasons for wanting to create a self-hosted blog. As a matter of fact, it’s a better choice for most users.
Here are a few things you’ll need:
- A valid credit/debit card or Paypal account
- A domain name (to be registered)
- $60
How to create a self-hosted blog on top-notch servers

There is a myriad of web hosting companies out there, but I’m going to recommend HostGator based on my experience and a couple of other factors. It’s the best choice for people on a low budget but who want first-class services. Of course, if you need robust servers for a full-blown e-commerce website, you are fully covered.
HostGator shared hosting packages are highly recommended. I would personally vote for the Baby Plan for a couple of reasons:
- Very affordable
- It allows unlimited domains. That means you will be able to host many more sites in just one hosting account. You won’t have to buy a hosting plan for your next website.
- Unlimited storage
- Email addresses
- Unlimited bandwidth
- Weebly website builder, so you can get the same functionality you would get with a provider like Squarespace.
- $100 Google Adwords and $100 Yahoo/Bing credit. This makes HostGator a great option for bloggers hoping to make money from their blogging venture.
- Very easy control panel
- 45 day Money Back Guarantee
- 24/7/365 Technical Suppor
- 4,500 Free Website Templates
Start a self-hosted blog with HostGator
Step 1: Domain name registration
Ok, we’ve established that HostGator is the best choice now. So let’s get everything set up within the next few minutes. Firstly, go to the HostGator pricing page.
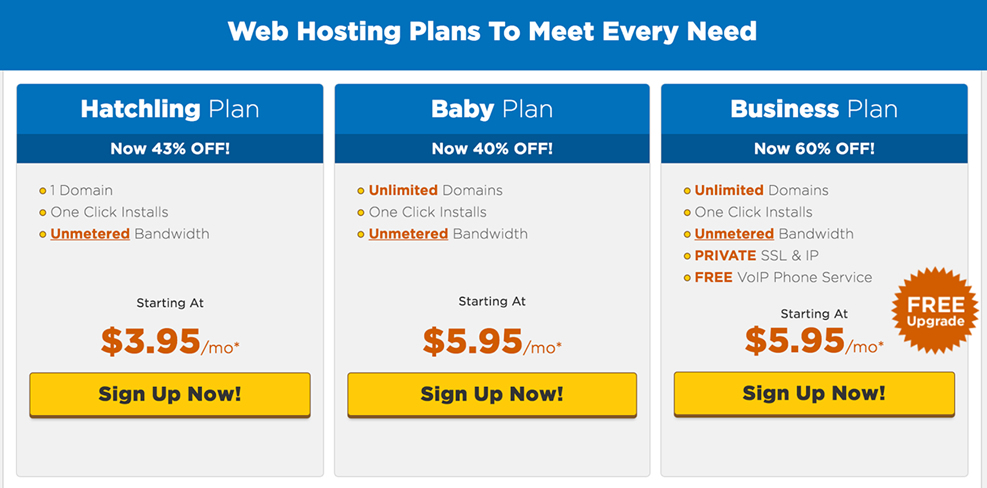
I recommend the Baby Plan, but you are free to pick any of the three. After you’ve picked a plan, click “Sign Up Now!“
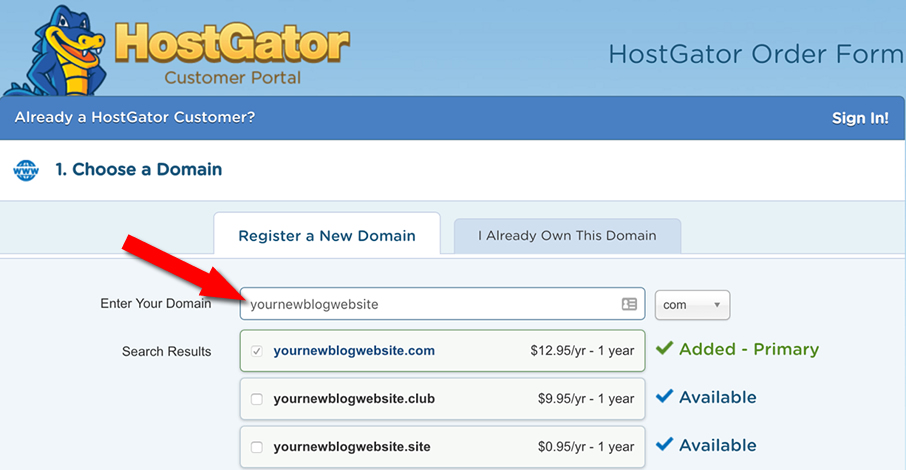
On the window that follows, you are going to have two options:
Option 1: You already have your domain name registered elsewhere. If that’s the case, you are going to click the “I Already Own This Domain” tab. After completing your order, you will only have to get the HostGator nameservers and update your domain.
Option 2: In this other option (which is the default active tab), you are going to allow HostGator to register your domain. This means they will set up your domain and configure your nameservers automatically. All you should do now is enter your new domain name in the form field.
Domain name privacy (optional)
This option (aka WHOIS protection) hides your personal information from the public WHOIS database. The WHOIS database contains information about the owner of domain names. This includes your personal name, address, phone, email, business name, etc. If the Privacy Protection option is enabled for a domain, a generic registrar-generated information set is displayed.

Step 2: Choose a hosting plan
In step 1 above, we’ve entered our domain name and (maybe) selected the privacy protection option. In step 2, we will confirm our hosting plan (Baby) and select a billing cycle. Note that the longer the cycle, the bigger your discount.
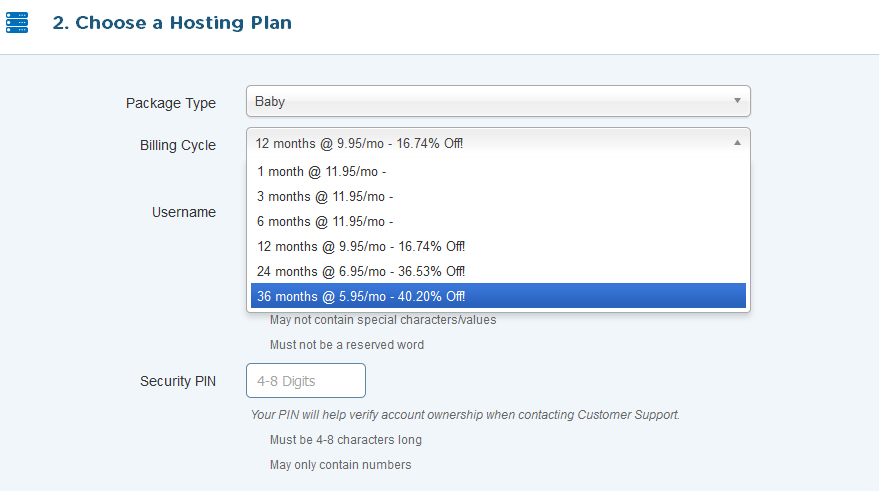
You will have to enter your username that will be used for your cPanel and default FTP accesses. The security PIN is a crucial element. It’s required by support staff for certain levels of intervention.
Step 3: Billing information
In this step, you are going to fill out the billing form and select a payment method. Any of the payment options you choose will work just fine, whatever suits you.
Step 4: Add additional services
These are (optional) services HostGator thinks may be useful to add more value to your blog. While these are not required, I recommend paying closer attention to them.