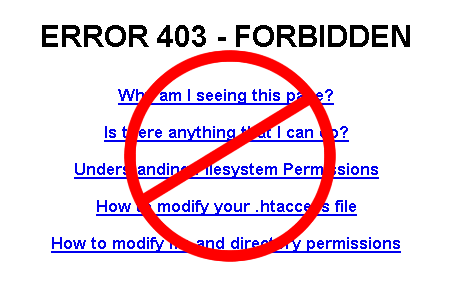
The 403 Forbidden error page is a web page that means accessing the page or resource you were trying to reach is absolutely forbidden. In other words, this is a no-go area.
For the most part, access to forbidden pages or directories on blogs or websites is done by visitors with evil intentions. However, genuine visitors for some reasons may find themselves 403’ed. That’s why we are trying to create a more user-friendly page to take care of this category of visitors.
Recommended reading: How to disable directory listing on your blog. Directory listing is a security weakness so I encourage you check out this post.
Custom 403 forbidden error page – no plugin
There are literally many ways to create and host your own custom 403 error page. From editing the default error page in cPanel through the use of plugins to simply following the steps discussed in this post.
Personally, I don’t like going with plugins. You know what I mean? – extra load on my blog, security issues, etc so I have a pretty simple way to get a beautiful page up. No html or php coding skills needed.
The first step is to decide what to go on your custom 403 forbidden error page. You may simply just want to tell the visitor ‘hey you are not allowed here’ or add some more stuffs to make it more engaging. I have even seen some error pages with subscription form. It’s really up to you to set anything there.
Create a page with basically anything you want
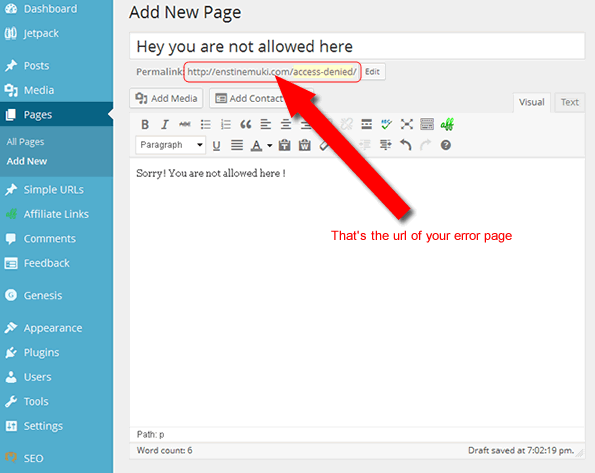
As illustrated above, you simply should create a WordPress page, publish and grab your page url.
Now you have your error page set. The next thing is to instruct the server to redirect to this page if someone tries to access any ‘no-go’ area on our blog.
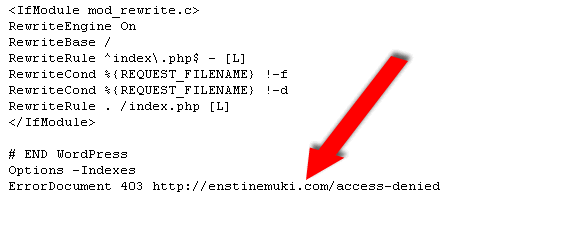
So grab the .htaccess file at the root of your blog. Generally, you will need an ftp (File Transfer Protocol) program to connect and download this file from your server.
Another option is to use the cPanel’s online File Manager. Whatever the method you choose to use, paste the following code at the end of your file:
ErrorDocument 403 https://yourdomain.com/access-denied
NB: replace yourdomain with your real domain name. You may also want to replace access-denied with any url of your choice.
Here below is what it may look like:
 Save the file and upload to the server
Demo
Now let’s see if it works on my blog. Click the follow link:
https://enstinemuki.com/wp-includes/
That’s how simple it is. If you however still are not able to get this done, contact me so we can work a way out.
Let me hear your thoughts in the comment box
Comments are closed.