
Screensavers are more than just nostalgic visual displays. They help protect your monitor, add a personalized touch to your desktop, and provide additional security when your computer is idle. Windows 10 and 11 both offer screensaver options, but accessing and customizing these settings differs slightly. Windows 10 uses the Control Panel to access screensaver settings, while Windows 11 uses a more streamlined approach through the Personalization menu. In this article, we’ll explore how to set up screensavers on both Windows 10 and Windows 11.
How to Access Screensaver Settings on Windows 10 and 11
Steps to Access Screensaver Settings in Windows 10 and 11:
On Windows 10:
- Navigate to Control Panel: To begin, open the Control Panel from the Start menu.
- Find and Open Personalization: Once in the Control Panel, click on “Personalization”.
- Click on Lock Screen: In the Personalization settings, select “Lock screen” from the sidebar.
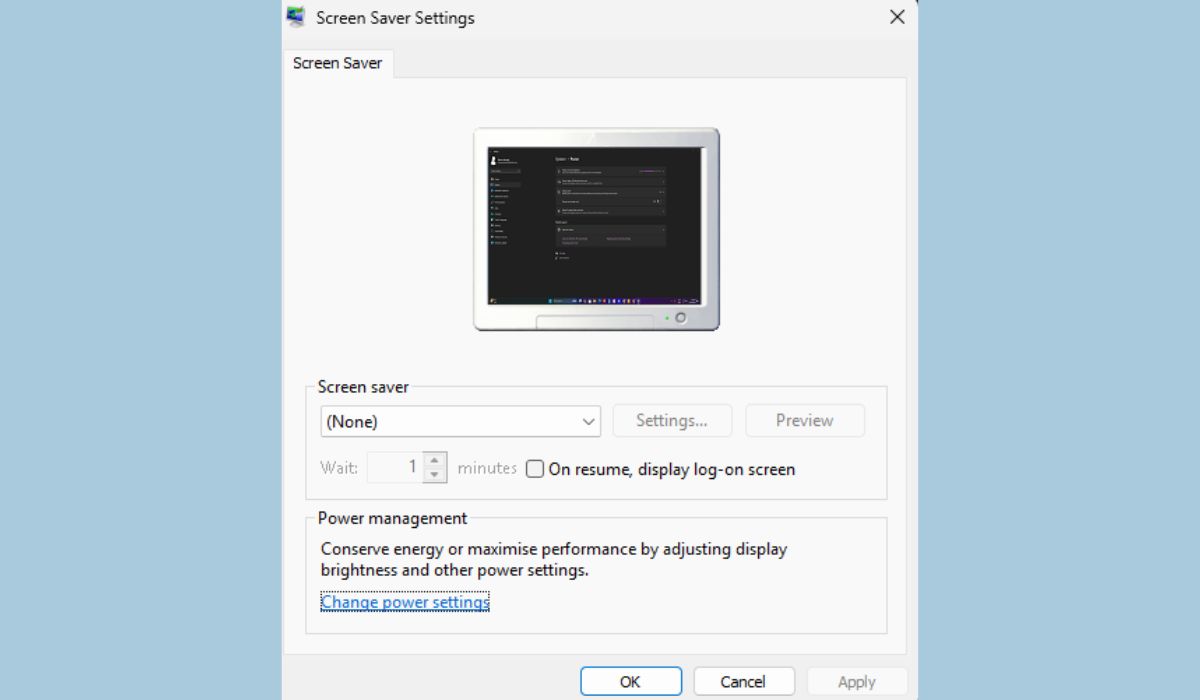
- Locate Screensaver Settings: Click the “Screensaver settings” link to open the configuration window.
on Windows 11:
- Right-Click on Desktop: To access screensaver settings, right-click on the desktop and choose “Personalize”.
- Click on Lock Screen: In the personalization settings, select “Lock screen” from the options provided.
- Locate Screensaver Settings: Scroll to the bottom and click on the “Screensaver settings” link to open the configuration window.
What Screensaver Options Are Available and How to Choose One
Windows 10 and 11 provide a variety of screensaver options to choose from, each with its own unique visual appeal.
- Available Screensavers: Options include classic choices such as “3D Text” (displays customizable text in 3D), “Blank” (turns the screen black to save power), “Bubbles” (floating bubbles move across the screen), “Mystify” (colorful lines moving in intricate patterns), and more.
- Preview Before Selecting: Once you’ve chosen a screensaver, click on “Preview” to see how it looks in real-time before making your decision.
- Recommendations: For a visually pleasing experience, the “Bubbles” or “Mystify” screensavers are popular due to their dynamic animations, while “Blank” can be a good choice for conserving power.
How to Customize Your Screensaver Settings for Maximum Personalization
Adjusting Activation Time
- Set Screensaver Timing: In the screensaver settings window, you can set the idle time before the screensaver activates. This is useful for energy saving and ensuring privacy when stepping away from your computer.
Password Protection
- Add Password Protection: To enhance security, check the box that says “On resume, display logon screen”. This will require a password to access your computer after the screensaver is dismissed.
Screensaver Preview
- Preview Screensaver: Click the “Preview” button to get a full-screen view of your selected screensaver. Press the ‘Esc’ key to exit the preview mode. This can help you decide if it fits your style or serves its intended purpose.
Additional Tips Should You Know for Screensaver Management
After setting up a screensaver, there are several additional options and settings you might find useful to ensure the best experience and optimal functionality.
Disabling the Screensaver Entirely
- Disable Screensaver: To disable the screensaver, set the screensaver option to “None” in the screensaver settings window.
Changing Screensaver Password
- Update Password Settings: If you need to change the password required after the screensaver, go to “Accounts” in the Windows Settings and update your login credentials.
Troubleshooting Screensaver Issues
- Screensaver Not Working: If the screensaver isn’t activating, try the following steps:
- Check the timing settings.
- Ensure no connected peripherals are keeping the system active.
- Update your graphics drivers to avoid compatibility issues.
Conclusion
Setting a screensaver on your Windows 10 or 11 PC is a simple way to protect your monitor from burn-in, add personal flair, and improve security. Whether you’re using Windows 10’s Control Panel or Windows 11’s streamlined Personalization menu, accessing and customizing screensaver settings is straightforward. By following the steps outlined above, you can easily activate and customize your screensaver to suit your needs, keeping your system both stylish and secure.
Screensavers can serve multiple purposes beyond aesthetics—they help extend the life of your monitor and secure your desktop when you’re away. Customize yours today to enhance both the security and style of your Windows experience.