In today’s digital age, securing your emails is crucial. One effective method to ensure email authenticity and integrity is by implementing DKIM (DomainKeys Identified Mail). If you’re a Namecheap user wondering how to enable DKIM, you’re in the right place. This guide will walk you through the process step-by-step.
What is DKIM?
Before diving into enabling DKIM in Namecheap, let’s understand what DKIM is. DKIM, or DomainKeys Identified Mail, authenticates the sender and detects tampering of email content during transmission. It adds a digital signature to outgoing emails, ensuring they are from the stated domain and haven’t been altered.
How to Enable DKIM in Namecheap
Namecheap, a domain registrar and web host, makes enabling DKIM straightforward. They generate a unique DKIM record to be added to your domain’s DNS settings. Receiving mail servers use this record’s public key to validate your emails.
Follow these steps to enable DKIM in Namecheap:
Step 1: Access Your Namecheap Account
- Log in to your Namecheap account or sign up if you don’t have one.
Step 2: Navigate to DNS Management
- In your account, find the “Domain List” and select the domain where you want to enable DKIM.
- Click “Manage” next to your chosen domain.
- Choose “Advanced DNS” or a similar option to manage DNS settings.
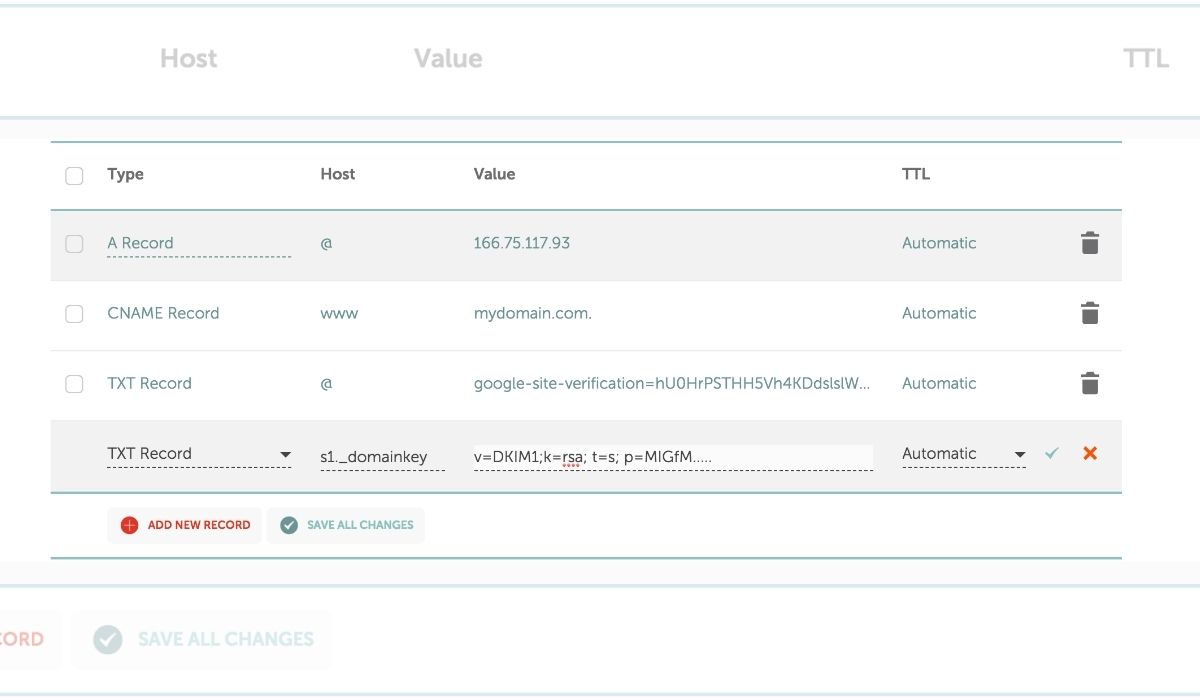
Step 3: Add a DKIM Record
- In the DNS management interface, look for “TXT Records.”
- Click “Add New Record.”
- In the “Type” field, select “TXT Record.”
- In the “Host” field, enter the selector value from Namecheap, like “default._domainkey” or “selector1._domainkey.”
- In the “Value” field, paste the DKIM record provided by Namecheap.
- Save the record.
Step 4: Verify DKIM Setup
- Verification might take up to 48 hours due to DNS changes.
- Use online DKIM checkers to verify the presence and correctness of the DKIM record.
Conclusion
Enabling DKIM in Namecheap is essential for secure email communications. Follow these steps to easily enable DKIM, double-check the setup, and verify its functionality. With DKIM, your emails are more secure and likely to reach their intended recipients’ inboxes.